“… if I were thrown in jail and I was allowed to weight train only half an hour three times a week, I would just do squats. That’s it.” – D. Charles
By now you should be well familiar with the history of the marketing monster that the fitness industry has become. Too many people these days focus on “core” strength and sell you equipment or teach dumb exercises on how to “target” the core. The fact of the matter is, the squat is the single best “core” strengthening exercise out there as it balances the muscles of the hips and knees. Please don’t believe the lies.
This will be the longest post in this blog and that is simply for the good reason that squats are the single most important exercise that one can do for their body regardless of what their fitness goals are. Take a moment and let that sink in.
Here is a more technical explanation: “There is simply no other exercise, and certainly no machine, that produces the level of central nervous system activity, improved balance and coordination, skeletal loading and bone density enhancement, muscular stimulation and growth, connective tissue stress and strength, psychological demand and toughness, and overall systemic conditioning than the correctly performed full squat.” – Mark Rippetoe
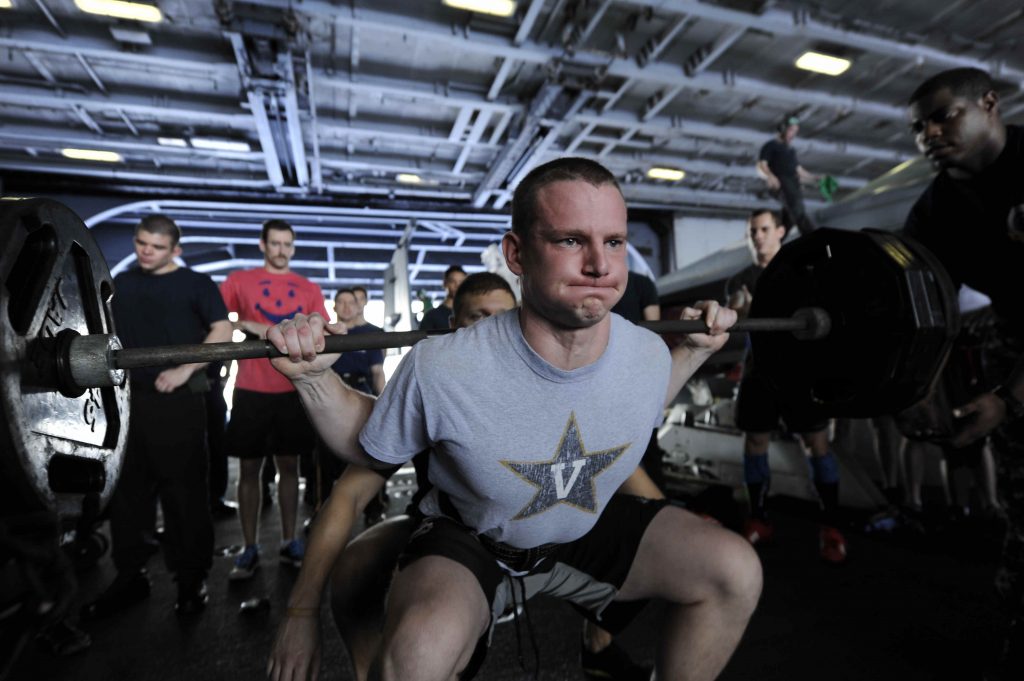
Squatting is not easy or is it fun. I myself avoided leg day for years simply due to the fact that there is much less of a visual impact when a person has big legs vs. a big upper body. Human beings are vain and enjoy experiencing improvements in body parts that they can visually see such as the chest and biceps. That said, the biggest regret I have to date in my strength training is not having started squats earlier. Have I got your attention yet?
The Setup
There are 2 variations of bar placement when performing the squat. The High bar Squat vs. The Low bar Squat. The conventional squat is High bar which is what you usually see people performing. The bar rests mostly on the lifter’s traps and the squat range of motion and back angle is more upright. I myself squatted with a high bar for many years until only recently discovering the low bar placement.
Without going into all the technical differences between the two (this article does a great analysis) the long short of it is…IT DOESN’T MATTER. It has been said that one can lift more weight in the low bar position, which is what intrigued me to begin with and prompted me to switch. In the end, just pick what feels right for you. Low bar squatting takes a bit of adjustment but personally I have found that due to the forward back angle I tend to look at the mirror in front of me less (which is a good thing) and focus more on the ROM thru muscle memory. Can I squat more weight? Not really. My squat is pretty weak as it is since I didn’t start squatted seriously until a few years ago so I never really got the benefits. Low bar squatting often feels awkward for newbies and it takes some time to adjust and learn how to position the bar so as not to add pressure to your wrists. In the end the only reason you would actually NEED to squat low bar is if you are a powerlifter because powerlifting is all about the amount of weight you can put up.
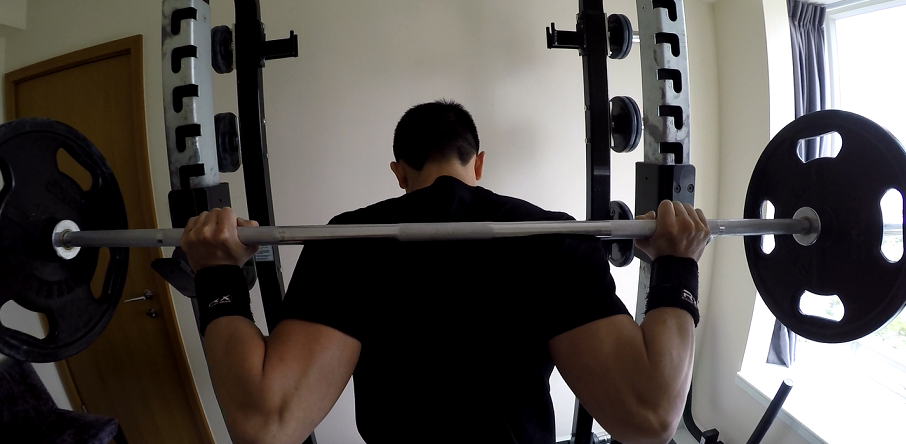
When performing the low bar squat the barbell should be positioned just under the spine of the scapula (bump on the shoulder blade you feel). When done properly this will create a “shelf” that will allow the bar to be locked into place by your grip.

Correct bar position for Low Bar Squats
The correct grip keeps the hands above the bar at all times and the weight of the bar on the back. Your hands/wrists should never be supporting any weight. They are simply there to lock the bar in place. You should experience some slight discomfort in this position initially as it is not a “natural” feel per se. Depending on your flexibility you will want your wrists positioned as closely together as possible. Wider grips are dangerous when squatting as they don’t provide the “lock” that you need to keep the bar in place, especially as you go up in weight.
Also, they (the experts) say that you aren’t supposed to wrap your thumb underneath the bar like I have shown above. But that also depends on your wrist flexibility. I recently injured my wrists so I choose to grip it this way for now and wear write braces. Those will come off as soon as I recover.
Bar Height
It is important to set the rack height so the bar is level with the middle of your chest. This may seem to “low” for you if will be doing low bar squats and you will need to be able to rack the bar lower than a high bar squat would require. You will also appreciate this on your last rep as you squat to failure.
Rule of thumb: When setting up for a squat, always step back out of the rack to perform your squat. And when you are done you step forward to rack the bar. NEVER step out into a squat as this forces you to have to walk backwards at the end of the set to rack the bar and is very dangerous, especially when you are fatigued.
Bar Path
Remember, the most efficient bar path when performing these compound lifts is a straight line from the floor. Visualize this in your mind as if the bar is locked into a channel that cannot move laterally, just up and down. *on that note, I highly recommend readers NOT to use the Smith Machine in the gym to perform any of their compound moves. Despite it locking in the bar path in the right vertical path you give up many benefits from training with free weights. Just don’t do it. The leg press machine is even less useful because it restricts the movement of the joints that normally adjust during a squat.
Squat Depth
The full squat is where the hips drop below level with the top of the knees. This is the full range of motion. Any squat that is not a deep squat is a “partial squat” which does nothing but stress the knees and quadriceps and they should not count as a rep. You can also lift a lot more weight doing partial squats, much more than you can handle doing a correct deep squat which is why you see many youngsters in the gym doing this. This will only lead to injury down the line. Learn to do a proper squat first and work your way up with the weight. Don’t try to be a hero.
Breathing
I will write a separate post on the Valsalva method but here is the quick and dirty of it. Before you begin any rep of any compound exercise you should take a full deep breath in and hold it. This creates a dense air pocket in your torso that will assist you with the lift and get you in the right frame of mind. Mark Rippetoe compares the Valsalva maneuver to the force you exert when you are try to push a car that has stalled on the street. Think about that scenario. You are behind the car with a few friends. Someone yells out “One two…three!” and everyone pushes together at the same time. You take a short deep breath in and then push with all your might. Maybe you even let out a groan as you push, with your breath still held in. THAT is the Valsalva technique.
Equipment
Shoes – always use shoes that have flat soles that do not compress in the heel. You can go for a 25 dollar pair of converse and that will be good enough. “Squatting in running shoes is like squatting on a bed” – Mark Rippetoe
Belts – I’ve never advocated the use of belts. They are often used incorrectly and cause people to attempt more weight than they can and compromise form. Simple rule of thumb is if you can’t lift the weight without a belt then you have no business lifting that amount to begin with. Once you get advanced and into the super heavy weight category then we can talk about belts.
Squatting 101: Don’t over think it
As with all of the lift recommendations that I make, the one underlying theme that I want to stress is don’t over think it. Sure you can spend hours tweaking and adjusting form to get it just right. Form is important and prevents injury but remember we aren’t competing in a powerlifting competition here. We just want to get stronger. And to that end there is an element of “don’t think, just do” that is needed. In all reality, if you are deep in the hole of a 300lbs squat you aren’t going to give a shit about “form” at this point. You are just going to do whatever it takes to get your ass out of the hole and that bar back up to the rack. That said, lets learn the form now. No weight at first.
- Start with your feet slightly wider than shoulder width apart and pointed out roughly 30 degrees.
- Squat down. Make sure your knees follow out in the same path and angle that your feet are pointing at. Go all the way down.
- Flexibility may be an issue at the bottom of the squat. If you aren’t comfortable being down in the squat without a bar and holding it, then you may need to spend some time working on flexibility first. (think Asian man squatting on the street)
- Your back should be 45 degree angle (for low bar squat) and not upright.
- Your eyes should be looking down at the floor a few feet in front of you and not at a mirror (common mistake). Never look up at the ceiling.
- From the bottom of the squat or the “hole” as we call it, you drive your hips (ass) up first. Mark Rippetoe has devised a good way to visualize this mentally and that is to assume there is a chain attached to your ass and someone is pulling that chain up in a straight line to the ceiling. That is the range of motion your hips should take coming out of the hole. Not a “forward” movement of the hips. Also make sure your back is not “rounded” in the bottom of the squat.
- Don’t think about pushing with your legs or that this is a leg exercise. Just focus on getting your hips out of the hole. The squat is not a leg press.
- Don’t over think it.
And there you have the basic mechanics of the squat. Practice this over and over again and get used to how it feels being in the deep squat or hole. Remember, visualize the old Asian man squatting on the street and being able to hold that position for hours and hours. That’s what you want to be able to do. Remember what it feels like. You will be grateful for committing this to muscle memory once you start adding weight.
Adding Weight
Once you add the bar and start adding weight, it is important that the form has already become second nature to you. There is a tendency for people to start “cheating” and not going down all the way once they add weight since they are too eager to hike up the amount they can squat vs. performing a full squat. Remember, it doesn’t count if you don’t go all the way down. Make sure each rep is a full squat before you think about adding weight. I am all too guilty of this as well
The second tendency people catch themselves doing is rotating their feet back in from the 30 degree angle. For some reason under the weight of the bar people like to revert to straight foot positioning. Remember to keep your feet at 30 degrees.
Knee positioning is the third mechanical error that most people when performing the squat. Your knees should shove out as your go down and follow the same line as your feet.
The 7 Deadly Sins of Squatting
- Not going deep enough
- Knees not following the path of the foot
- Back is too upright (for the low bar squat)
- Bar is not placed properly under the spine of the scapula
- Hip drive from the bottom is not performed in an “ass out of the hole” manner
- Rack is too high
- You look at your form in the mirror instead of a point 10-15 feet in front of you.
In conclusion, if you aren’t already squatting then stop reading this right now and go start. Today. Even if you hate doing legs like I did for the first decade of my working out life, it has been proven that heavy leg work is the fastest way to build the muscled of your upper body. Don’t think, just do.
